How to repair your clogged Keurig! One stop solution
Do you find yourself with a clogged Keurig and need help to repair it? You’re not alone. Every day, countless Keurig owners across the country face this same dilemma. Fortunately, there is a one-stop solution to your problem: a comprehensive guide on how to repair your clogged Keurig. This blog will provide detailed instructions on how to quickly and easily unclog your Keurig. Whether your Keurig is clogged due to daily wear and tear or an accident, this guide has you covered. Read on and discover how to get your Keurig back up and running in no time!
Contents
What causes Keurig to clog?
- The brew head or K-Cup holder is clogged with coffee grounds or old coffee.
- The needle puncturing the K-Cup is blocked with coffee grounds.
- The water tank is not full enough.
- The water line is blocked with minerals.
- The K-Cup holder is not seated correctly.
- The water filter is clogged with sediment.
- The brewer is not primed correctly.
- The water reservoir is not securely seated on the brewer base.
- The brewer has not been descaled properly.
- The brewer is not working properly.
Also read: Can You Make Espresso With Keurig: There’s a Trick!
Why should you unclog Keurig?
- If your machine accumulated coffee grounds and other debris that clogged the needle.
- If your machine accumulates mineral deposits blocking the flow of water.
- If your K-Cup is not puncturing properly due to a clog or debris.
- Excess air pressure built up in the system.
Keurig clogged because of air
Accumulation of air within the Keurig coffee maker Even though it’s unlikely to occur, sometimes it does. To remedy this, one should stick to the following:
To approximately one-fourth of its capacity, the water reservoir should be filled. In this manner, all of the air in the systems should have been expelled from the machine, and the Keuring should once again be able to pump water.
How to unclog Keurig?
Keurig coffee makers are popular for their convenience and ability to produce delicious cups of coffee. However, like any appliance, the occasional clog can occur. If your Keurig is clogged, don’t worry — there are easy steps to unclog it quickly and easily. This guide will show you how to unclog a Keurig so you can enjoy your coffee again in no time.
There are three ways to remove a blockage from a Keurig coffee machine.
- Cleaning the separate parts
- Manually unclogging pollutant blockages
- Vinegar descaling
Method 1: Cleaning the separate parts
Step 1: Wait 30 minutes after unplugging the Keurig from the wall before reassembling it
To thoroughly clean the Keurig, you will need to gain access to the components responsible for transporting water and coffee grounds. Some electrical equipment can be found close by. Remember to unplug the device from the wall before opening it.
The water in the Keurig needs to cool for 30 minutes. If you’ve recently prepared coffee, the water in the machine might still be hot. There will be a noticeable decrease in water temperature as soon as power is removed from the machine. Allowing enough time for it to cool down can prevent burns.
Step 2: Take apart the water tank and any other removable components
Detach the machine’s water storage tank by lifting it off its base. Once you’re ready to get rid of the drip tray, just pull it toward you. The coffee pod holder, shaped like a black funnel, may be accessed by removing the top of the coffee maker.
It’s simple to remove each of these components by hand. If you’ve never taken the funnel off before, it will take some effort, but you won’t need a screwdriver or anything fancy.
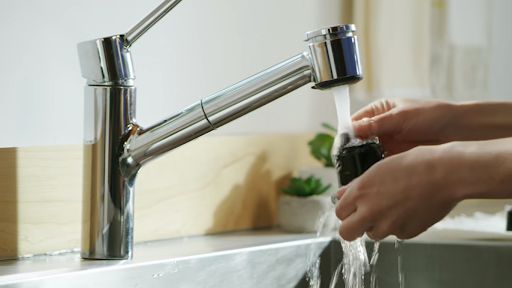
Step 3: Wash all components in hot water with liquid dish soap
Clean all the detachable components by scrubbing them with a microfiber cloth dampened in warm, soapy water. A buildup of coffee grounds or scale causes these parts, especially the coffee pod holder, to become ineffective. Remove any remaining material by thoroughly rinsing the components under running water.
Keep an eye out for underlying elements. Both halves of the coffee pod holder should be disassembled and washed separately. It’s a good idea to clean the reservoir tank cap as well.
To clean the machine’s outside, spray some dish soap into a sink, then wipe it down with a microfiber towel.
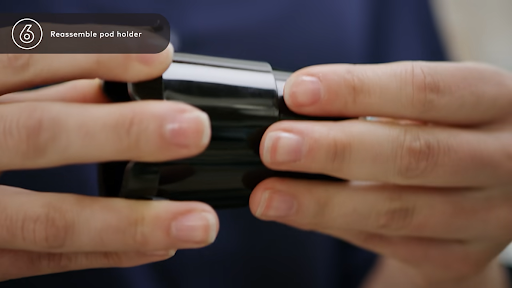
Step 4: After cleaning, reassemble the Keurig parts
Give them a quick rinse with warm water if coffee grounds are on any parts. Use a microfiber cloth to dry them off and then replace them. Put the coffee pod holder inside the slot inside the machine’s top, then slide the drip tray and water reservoir back into position.
Method 2: Manually unclogging pollutant blockages
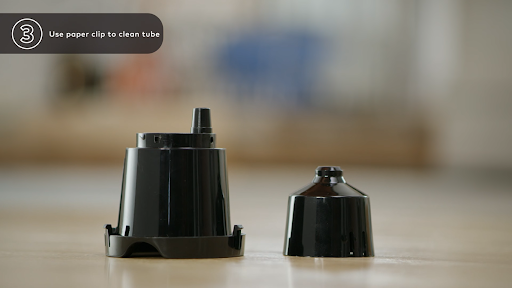
Step 1: You can use a paperclip to clean out the coffee pod holder
To use a paperclip as a scraper, straighten up one end. Then, take a look at the coffee pod holder’s narrower side. As you approach the end of the funnel, you will notice various openings. To remove coffee grounds from the holes, simply insert the end of a paperclip.
There are 2 components to the pod holder. You can separate them by hand and use the top, bigger piece as a funnel.
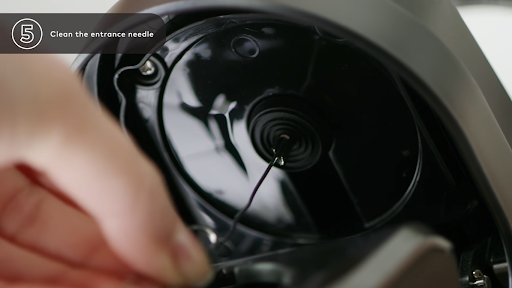
Step 2: Remove the debris from inside the Keurig using the paperclip
The pod holder is located in a specific location inside the machine, and the needle is situated directly above it. The machine’s tiny metal needle can be accessed by opening the top and looking along the edge. A trio of holes around the needle connects the water line to the pod holder. To remove any debris that has become lodged, simply insert the end of a paperclip into one of the holes and twist it. For Keurig 2.0, you can use the specified cleaning tool called the Keurig needle cleaning tool.
The Keurig’s needle, which is used to puncture the K-Cups and extract the coffee, is always on the unit’s top.
Step 3: Empty the Keurig by shaking it out in the sink
You should take the coffee maker and put it upside down in the sink. To flush out the paperclip’s loosened contents, give it a good shake. Tapping the machine’s base also aids in ejecting tenacious dirt and dust.
To prevent a major cleanup, it is recommended that you clear the clogs while standing over a sink.
Step 4: Blow air through the water line using a straw
Find the water inlet where potable water enters the device from the tank. It is at the tank’s bottom and is typically white in color. Flip the Keurig upside down and insert a plastic straw or turkey baster into the spout. You can eliminate any lingering particles by puffing several times through the straw.
The trash in the water line can also be accessed by removing the cap on top of the machine, which slides off. A large transparent tube will be running in the direction of the needle. In order to remove any mud or other black particles that may be lodged in the tube, give it a good squeeze.
That’s how you can unclog Keurig manually. Additionally, it’s a common practice to unclog Keurig mini.
Method 3: Vinegar descaling
Step 1: Add some vinegar to the water before you put it in the tank
If the water tank is already full, empty it. Next, add half a liter of distilled white vinegar to the fuel tank. Fill the container to its utmost capacity with pure water.

Step 2: Make hot water in the Keurig
Place a large mug under the coffee maker as if you were about to make a pot of coffee. Press the button for a regular cup of hot coffee and start the machine. Leave the tap running until the mug is full. The cup should be returned to the drip tray when the vinegar water has been discarded in the sink. Let the machine run until all the vinegar water in the reservoir has been consumed.
Step 3: Run two cycles of clean water through the Keurig to clean it out
When the vinegar solution is gone, you can remove the tank and refill it with fresh water. Return your cup to the saucer. Start the machine up again and let it run until the water is gone, refill the mug if necessary. You should repeat the operation if vinegar is still in the water line. Check out my article on how to descale Keurig for further information if you need help following the steps.
Step 4: If vinegar is still in the machine, fill the tank with clean water and turn it on
Before assuming the machine is spotless, check the water quality in your mug. In other words, you should smell it before you try it. You still have vinegar in your Keurig if the water tastes sour. Repeat flushing the machine with clean water until you’ve removed all traces of vinegar.
7 Expert tips and tricks for unclogging your Keurig
1. Use vinegar and water:
Fill your coffee pot with equal parts white vinegar and water and run it through a full cycle.
2. Boil water:
Boil some water and pour it into the carafe. Let it sit for a few minutes, then run the cycle again.
3. Use a bottle brush:
Use a bottle brush to gently scrub away any build-up of coffee grounds or other debris in the filter basket or carafe.
4. Use a paperclip:
Straighten a paperclip and use it to clean the small holes in the filter basket carefully.
5. Clean the filter basket:
Remove the filter basket and soak it in a solution of vinegar and water for a few minutes.
6. Clean the carafe:
Fill the carafe with vinegar and water and let it sit for a few minutes. Then rinse it out.
7. Keep it clean:
Make sure to regularly clean your coffee maker to prevent clogs in the future.
Conclusion
Congratulations! You have now learned how to unclog your Keurig and keep it running smoothly for your coffee-drinking pleasures. No more long trips to the local cafe for your morning cup of joe. Enjoy your freshly brewed coffee with peace of mind knowing you can handle any clogging issue in the future. If you’re facing any other trouble with Keurig, follow the article on how to use Keurig.
Cheers to clog-free cups of coffee!
Frequently Asked Questions
Why is my Keurig Mini not dispensing water?
If your Keurig Mini is not dispensing water, check to ensure that the water reservoir is filled and properly seated. If the water reservoir is filled, it is likely that the water pump will be clogged. To fix this, you will need to perform a deep cleaning of the pump and other components. Instructions on how to do this can be found on our website.
Also read: 15 Best Keurig coffee makers of 2023: tested and rated
How do I know when my Keurig is clogged?
When your Keurig is clogged, you may notice that your coffee is not brewing as quickly or as hot as usual or that it is not brewing at all. You may also notice a significant decrease in water pressure during the brewing process. If these signs are present, it is likely that your Keurig is clogged and needs to be cleaned.
Will vinegar unclog a Keurig?
No, only vinegar will not unclog a Keurig. You should try running a cleaning cycle first to see if that helps. If not, you may need to disassemble the Keurig and clean it more thoroughly.
How do you unclog a Keurig exit needle?
- Turn off and unplug the Keurig machine.
- Remove the K-Cup holder and drip tray.
- Unscrew the exit needle from the bottom of the K-Cup holder.
- Soak the needle in a mixture of equal parts white vinegar and water for 30 minutes.
- Use a toothpick to clean out any debris from the exit needle.
- Rinse the needle with clean water and allow it to dry.
- Reassemble the K-Cup holder and exit needle, and plug the Keurig back in.
How do you unclog a Keurig with a paperclip?
If your Keurig is clogged due to a buildup of coffee grounds or other debris, a paperclip may be used to unclog it. To do this, turn off the machine and unplug it from the outlet. Find the needle inside the Keurig and use the paperclip to dislodge any debris that is clogging it gently. Be sure to be careful while doing this, as you don’t want to damage the needle. Once the debris is cleared, plug the Keurig back in and turn it on. If the problem persists, you may need to replace the needle.
How to fix Keurig clogging after descaling?
- Run a few brew cycles of plain water to flush out the descaling solution.
- Check for any clogs in the water hose and needle valve. If you find clogs, clean them out with a stiff bristle brush.
- If the clog persists, run a few brew cycles with a specially formulated descaling solution.
- If the clog persists, you may need to disassemble the internal parts of the Keurig and clean them individually.
- If the clog still persists, you may need to replace the needle valve or the entire water tank assembly.
How to fix Keurig clogging after vinegar?
After using vinegar to clean your Keurig, you should do a few more things to fix any clogging that may have occurred.
- Run a few tankfuls of fresh water through the machine without any coffee. This will help flush out any residue left behind by the vinegar.
- If the clogging persists, you can use a needle to clear out any blockages in the exit needle.
- If the clogging is still present, you can remove the exit needle and soak it in a vinegar and water solution for a few minutes. This will help to break down any built-up residue. 4. Finally, you can also use a descaling solution to clean the inside of your Keurig. This will help to remove any further buildup in the machine.